
Location:
Penland School of Crafts
Spruce Pine, North Carolina
Date: Last week of August, 2019
In the last week of August, six souls came together at Penland School of Crafts to study wood type cutting under instructor Scott Moore and master printer Brad Vetter. Moore is the proprietor of Moore Wood Type, a concern he started after retiring from decades as a high school shop teacher. His extensive skill sets in machinery and wood working made him the perfect person for his printer daughter to turn to when she desired more wood type for her letterpress. Inspired by the request, but not knowing much about wood type, Moore set out to study under one of the few remaining wood type cutters at the Hamilton Type Museum in Wisconsin. Taking that training and adding much study and personal inquiry, Moore modified sign cutting pantographs to produce wood type and started producing the masters for tracing as well as the final product.

Today he sells decorative cuts, produces custom lettering and teaches what he has learned to the next generation to carry on. (In our case we were NOT of the next generation of student…but still it was fun pretending we were!)
The Process:
First create a design for your master pattern, make it wrong reading and cut that design out of bass wood sheets. That pattern is mounted on a block of wood that brings the total depth to type high. Scott brought a huge selection of already prepared patterns for us to choose from. Stars, snowflakes, our home states ( he cut for us) special cuts, borders, and especially ampersands. 
 Arrows indicate the direction to move the tracer as you cut.
Notice the blank piece of wood in the tray below? That is how finely the surface is finished before it is cut into the type. The laborious process of cutting, sanding and finishing the exactingly type high blank boards (about 8 x 10″) had thankfully been completed by Scott prior to the class. Our job was to cut the blocks to the needed size on the table saw (!).

The finished pattern is positioned on the pantograph and the appropriately sized tracer is inserted into the tracing arm. If the tracer is too large it will not fully get into the counters and curves, too small and it will take a very long time to remove all of the excess wood. 
Then a ratio of decrease or increase of the pattern is calculated to produce the desired finished type size and the mechanism is set. (Math is involved but one of us sheepishly avoided that by relying on others in the class who had degrees in engineering at Virginia Tech…thanks, Ron!)
The comes some fussy positioning to make sure that the newly cut letter will be cut exactly onto the block surface, not losing any curves to the edge and not leaving too much extra space on the sides.

(Photo: Brad Vetter)
Shown above: On the left is the pattern. The blank type high block is placed on the other (right) side platform under the drill which is lowered to allow cutting to commence.
Within a few minutes a flurry of wood shavings is produced and so is an exact replica (in the same or smaller size) of the pattern.
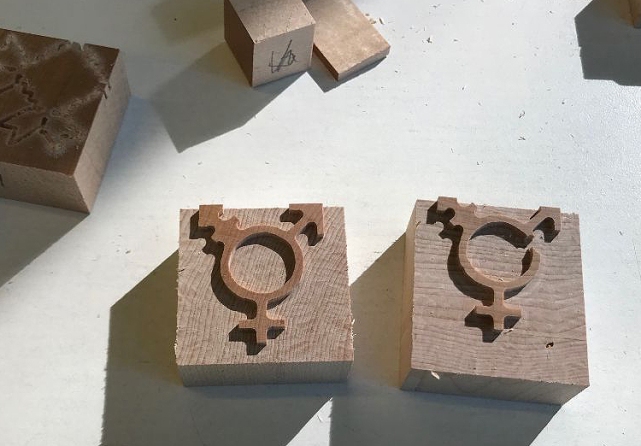 Practice makes perfect. These cut blocks have extra space on some sides but could be cut down after carving if desired.
After the type is cut there is often some fine finishing required. In the photo below the points and valleys of a star are cut sharply using a hand punch and hammer. Scott informed us that historically the finishing department was staffed with women.

There was also the option of creating our own custom type without a pantograph. (A good method for those of us who don’t own pantographs.)
Step 1: Cut the art from bass wood sheets and mount it on wooden blocks (making sure the final surface was type high). 
Laser cut designs ready to punch out of the sheet and mount on block.
In my case the instructor had precut an entire alphabet of 3” versal letters that I had provided in advance of the class. This turned out to be an experiment as Scott had never before made such large letters using this method. After gluing each letter to a block I added a layer of homasote beneath to bring the surface to type high. I spray-shellacked the top surface several times, making sure all edges of the letter were covered.  Type Nerds, Can you find the letter I mistakenly glued upside down?* Got a little “punchy” on those 12 hours days and unfortunately there was no recourse to correct.
When the shellac had dried it was time to sand the surface with 500 grit sandpaper, working for a very smooth surface for printing. (Needless to say, doing this process 26 times was tedious; cutting on the pantograph would be a better option if the time and equipment were available.) I found it interesting that I could smack the type onto the sandpaper and see the final letter. This is similar in concept to the testing of “smoke proofs” that punch cutters would make during the process of metal punch cutting. They would cover their punches with soot from an oil lamp and test print it on paper to check their progress. 
The class produced a lot of diverse projects which we printed and displayed on the last day at Penland. (Ok, gallery friends, I do Not taking credit for the red tape display method!)

As mentioned earlier Brad Vetter, master printer, was on hand all week for moral support at the table saw and the printing presses. In addition to helping us, he also made some great typefaces to use at his own press http://bradvetterdesign.com/ . Somehow he also found time to design a delightful poster, utilizing many of the wooden ornaments Scott provided. The class took turns printing the second color on 200 posters. Much to the delight of the community free posters were given out to all who attended the Friday evening letterpress presentation by Scott.

(Photo: Brad Vetter)


A delightful bunch: Instructors Scott Moore (right) and Brad Vetter (right rear) with the six typecutting souls…Ron, Jenna, Gina, Ashley, Riley and moi.
We all ended the week with a nice new batch of wood type and ornaments. Plus we received a document certifying each of us as one of about 300 people in the world trained on the wood pantograph. Immediately went on my LinkedIn skill list!
*It’s the E
Next Location: Northern Spain.
